This tutorial will cover the basics of getting a very simple SDL 2.0 project up and running on the GCW Zero with Linux. I am using Ubuntu Mate 15.04 64-bit and Code::Blocks 13.12. I wanted to create a tutorial that had all the steps from compiling your program correctly to getting it running on the GCW Zero all in one place. Sources will be at the bottom.
What we will need/get:
- A GCW Zero
- GCW ToolChain
- SDL 2.0
- Code::Blocks
- FTP Client (FileZilla)
- Telnet/SSH Client (PuTTY)
Alright, first things first. You want to program for the GCW Zero, so we will need to get the toolchain provided from the site which can be found here: http://www.gcw-zero.com/develop. For this tutorial I am using the 2014-08-20 for x86 Linux. Once it is downloaded we will need to install it correctly. The website has a quick tutorial on how to do it, but for convenience I will also put it here.
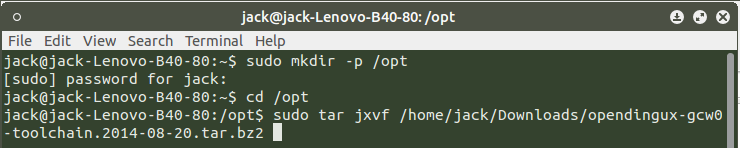
Open up the terminal and issue these commands:
sudo mkdir -p /opt
cd /opt
sudo tar jxvf /path/where/you/downloaded/opendingux-gcw0-toolchain.date.tar.bz2
For me it looks something like this:
If this is a fresh install of Linux, I recommend running these commands if you haven’t:
sudo apt-get install build-essential
sudo apt-get install gcc-multilib
build-essential will install development packages that we need, such as g++ and gcc. gcc-multilib will allow us to build 32-bit projects on a 64-bit machine, and since the toolchain is 32-bit we will need it.
Next, we will install Code::Blocks. You can either get this through the software center, or if you want to do it through the terminal:
sudo apt-get install codeblocksWith Code::Blocks installed, the last thing we will need right now is SDL 2.0. Since there is already a fantastic tutorial detailing how to install and use SDL, I will just direct you to LazyFoo.net and the first tutorial for Linux.
http://lazyfoo.net/tutorials/SDL/01_hello_SDL/linux/index.php
I highly recommend doing the first tutorial and get to the point where you have a screen displaying for a few seconds. The rest of this tutorial is going to be using that program with a few modifications. I currently have it set up so that the screen is 320×240, the color of the screen is blueish and it lasts for 5 seconds.
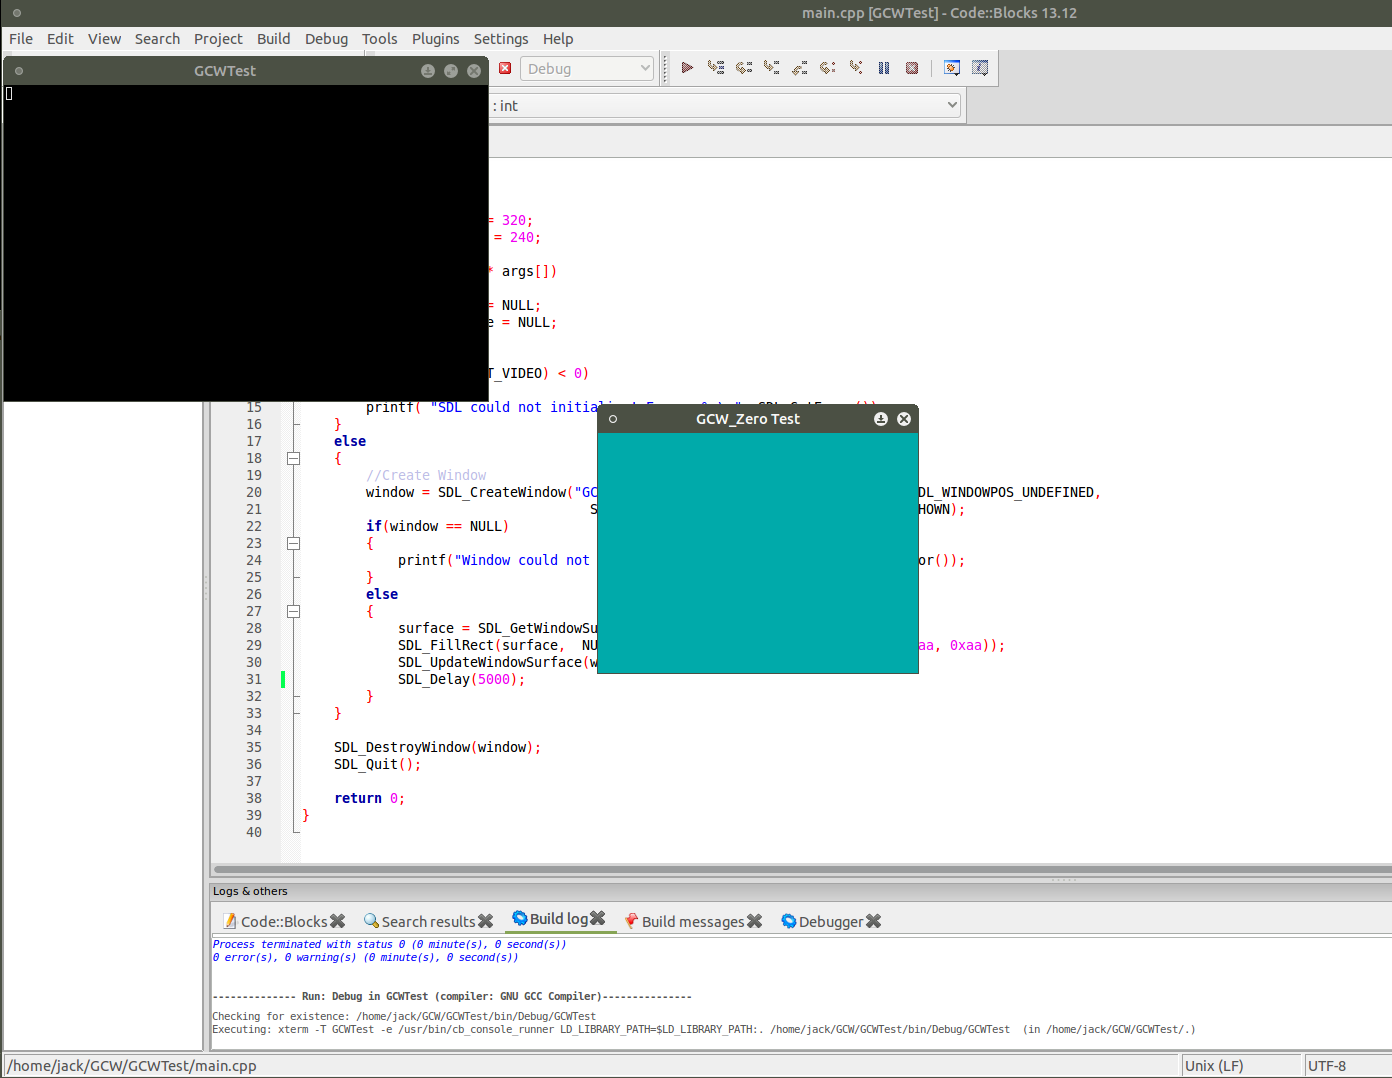
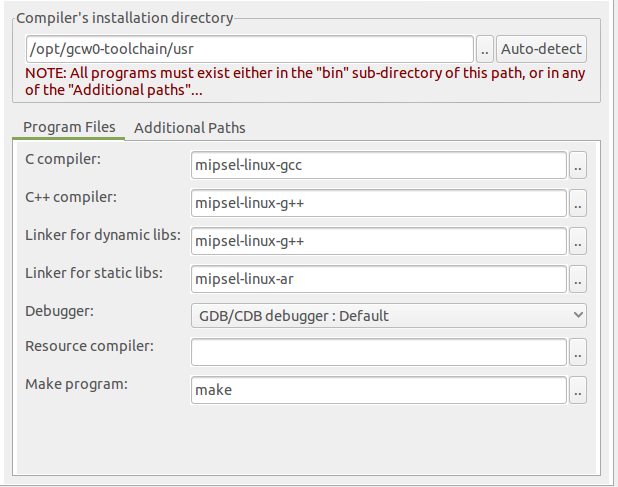
If you have something similar to this we will move on to the next step. To get this working on our GCW Zero we will have to make some changes to the compiler and set up the toolchain. In Code::Blocks go to Settings->Compiler and switch to the Toolchain Executables tab. You should be on a screen that looks similar to this:
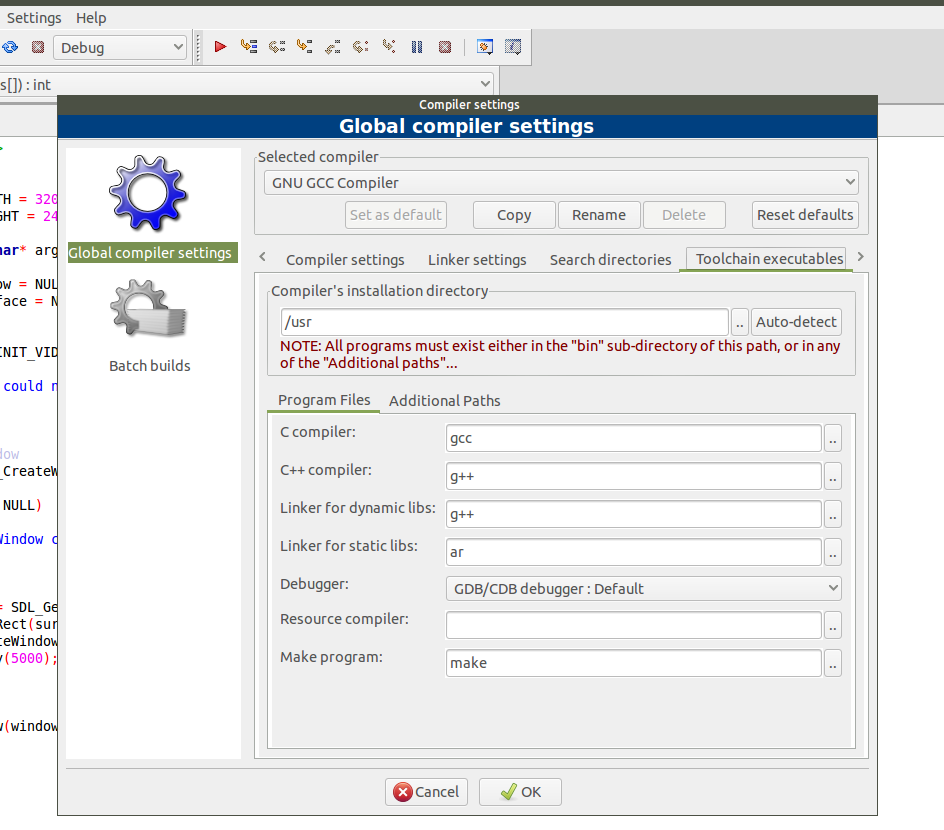
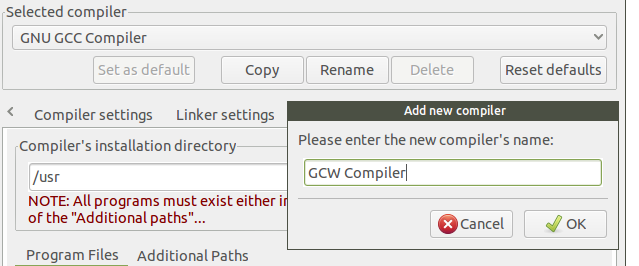
At this point we are going to make a copy of GNU GCC Compiler and rename it something like GCW Compiler or GCW Zero Compiler.
Now we will change the Compiler’s installation directory to where we installed the toolchain earlier: /opt/gcw0-toolchain/user
And change the Program Files so they match up with the new compiler:
- C Compiler-> mipsel-linux-gcc
- C++ Compiler-> mipsel-linux-g++
- Linker for dynamic libs-> mipsel-linux-g++
- Linker for static libs-> mipsel-linux-ar
In the end you should have something similar to this:
 Then hit okay.
Next we will need to change the project settings so that it uses our new compiler to build. Go to Project->Build Options and change your selected compiler to our GCW Compiler, apply, and rebuild our project.

Go to where it build the executable, open the terminal and typefile nameOfExecutable

This should verify that it is a MIPS executable. If it is, than congrats, we set up the compiler and built the executable correctly. Now for the part we have been waiting for: Testing our project on the GCW Zero.
For this we are going to use FTP to get our program on the device. I have had positive experiences with FileZilla so I’ll be using that for this part. You can either find it in the software center or through the terminal with:
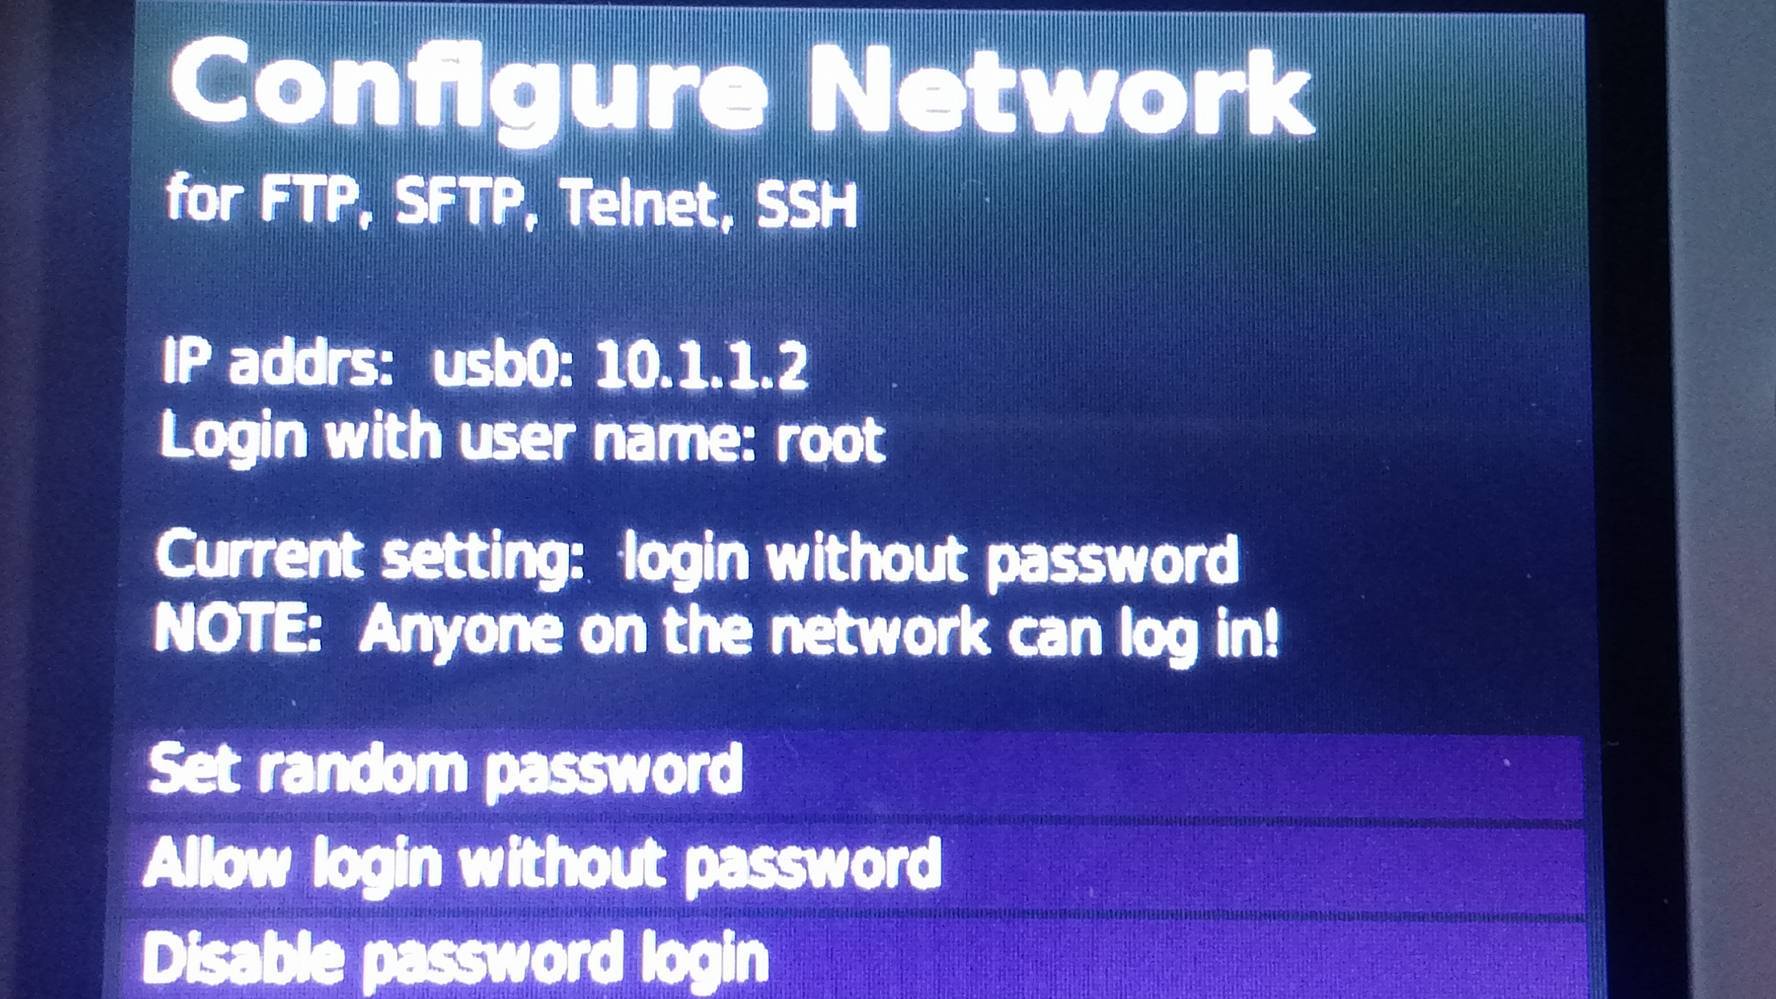
sudo apt-get install filezillaWhile you are getting that we might as well connect our GCW Zero to the computer with the USB cable provided. Once it’s connected, turn it on and navigate to Settings and launch network. On this screen you will see IP address and the user name we need to connect. If you have set up a password you will also see it on this screen.
Launch FileZilla, and enter the information you just got to connect to your device.
![]() If it connected you should now see a folder structure under remote site. For now jsut navigate to /media/data.
If it connected you should now see a folder structure under remote site. For now jsut navigate to /media/data.
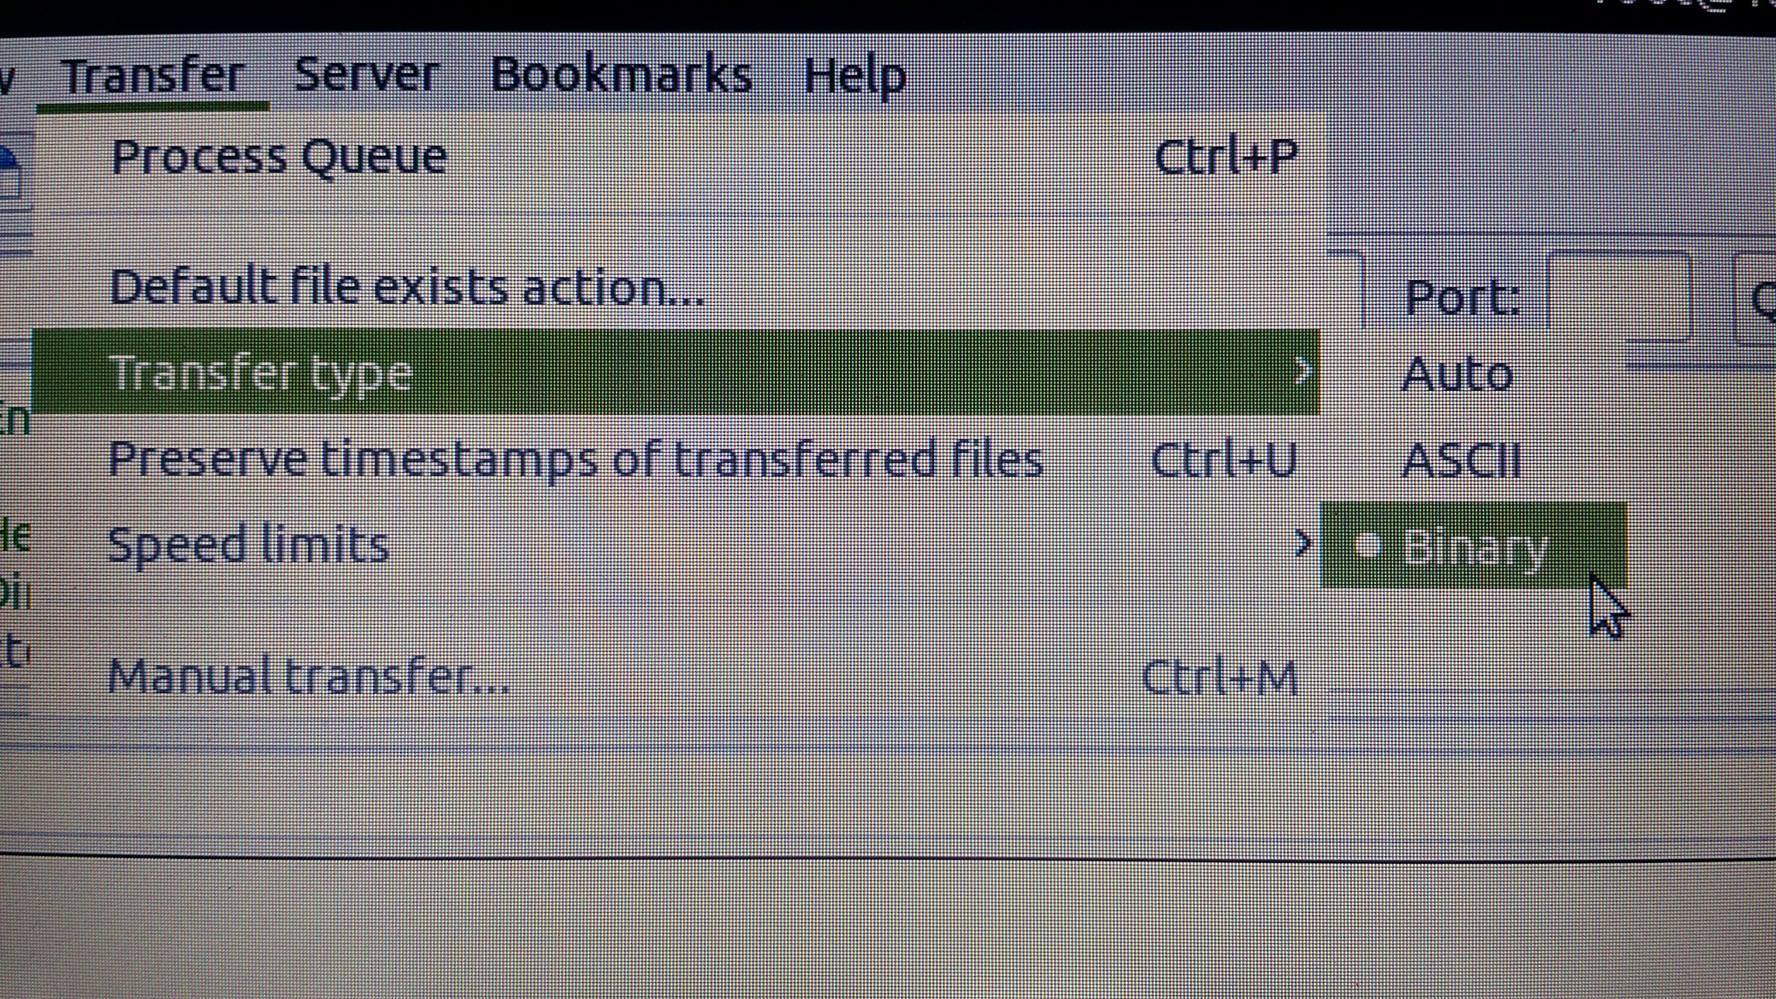
Next we need to set the transfer type in FileZilla to binary. If it is not set then it may transfer the program incorrectly. This can be done by going to Transfer->TransferType->Binary.
 Now go back, find you executable and put it in a folder titled what you want. I usually just name it the name of the project. We will be moving this folder over to our device. When that is all set you can send the folder over to the GCW through FileZilla by dragging it to the data folder under remote site. Or you can find the folder’s location on the local site, right click, and upload it to the remote site. After it transfers you should now see it on the remote site.
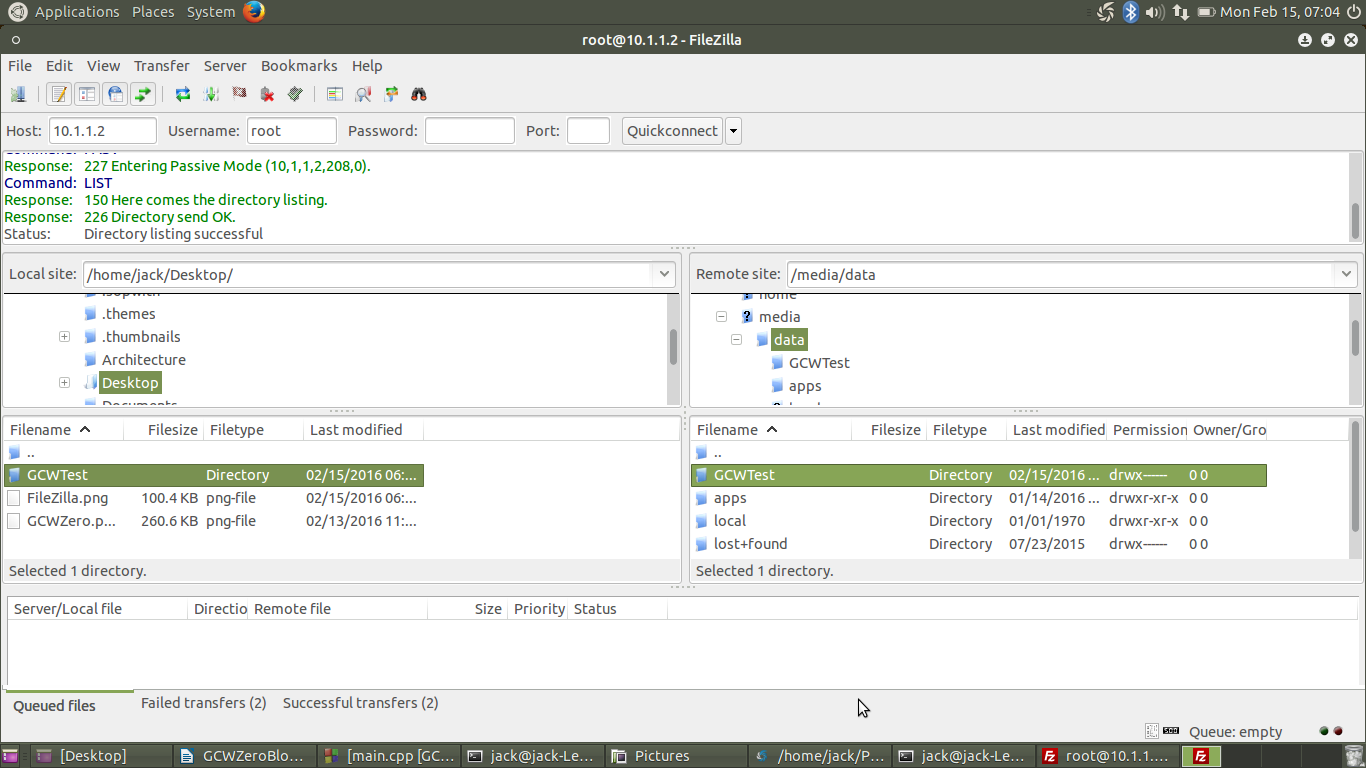
It is now on your GCW Zero. You can navigate to it by going to applications->Explorer->data->YouFolderName. From here you should be able to see you executable and try to run it. If it works, awesome were done! If not, there there are a few more steps we need to do to give it the correct permissions.
For this to happen, we will need one last program, some kind of ssh/telnet client. PuTTY works fine for this and you should be able to find it in the software center or through the terminal:
sudo apt-get install puttyOnce you have it, launch it! Set the Host Name/IP address to the IP address we used for FileZilla and set the connection type to telnet. If you want to you can save this session for next time.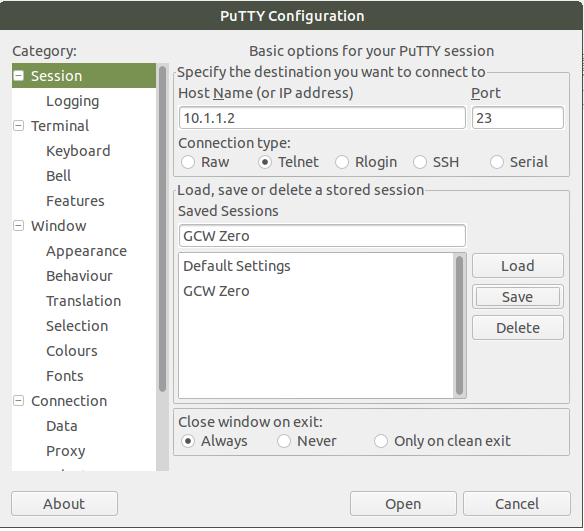
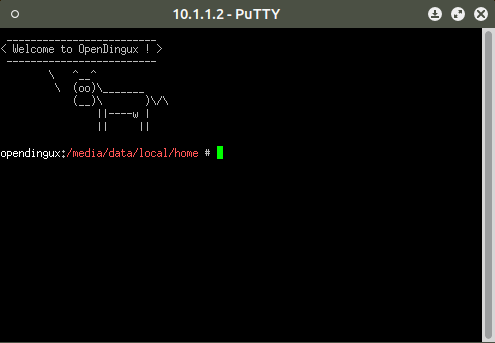
Hit open and we will be connected to a terminal.
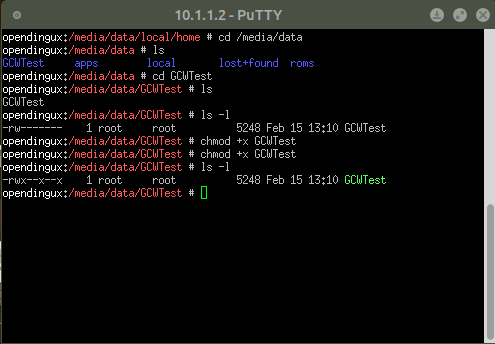
Navigate to the data folder:
cd /media/data
if you type ls you will be able to see what is in /data and you should see you own folder here. If you do, cd to it and type ls -l. This will show us your file and it’s permissions. If it is like mine it will look like:
-rw-------Which means that the file is not executable. To fix that type:
chmod +x FileNameIf you type ls - l again it should read
-rwx--x--xmeaning it is now an executable.
Back on your GCW navigate to the executable and run it. The screen should turn to whatever color you set it to and for how ever long you set it for. Congratulations, you got a program on the GCW Zero!
Sources:
http://www.gcw-zero.com/develop
http://wiki.surkow.com/Tutorials:CodeBlocks
http://boards.dingoonity.org/gcw-help/how-to-install-a-dingoo-program-on-the-gcw-zero/
http://boards.dingoonity.org/gcw-general/%28howto%29-terminal-access-to-gcw0-using-telnet/